What Is Interlacing?
Interlacing is used to reduce the bandwidth required to transmit television images. Because the human eye is sensitive to how quickly an image changes, a low refresh rate can make motion appear to stutter. Early television engineers addressed this by splitting each frame into two fields and transmitting one field every 1/50 of a second, rather than transmitting a complete frame 50 times per second. This made motion appear smoother while requiring bandwidth equivalent to 25 complete frames per second.
The image is split line by line: odd-numbered lines are transmitted at one moment and even-numbered lines at the next. Each half is called a field. Fields may be described as upper/lower, first/second, or odd/even.
Odd fields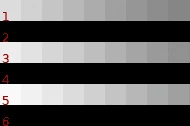
Even fields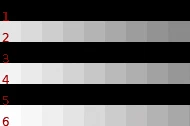
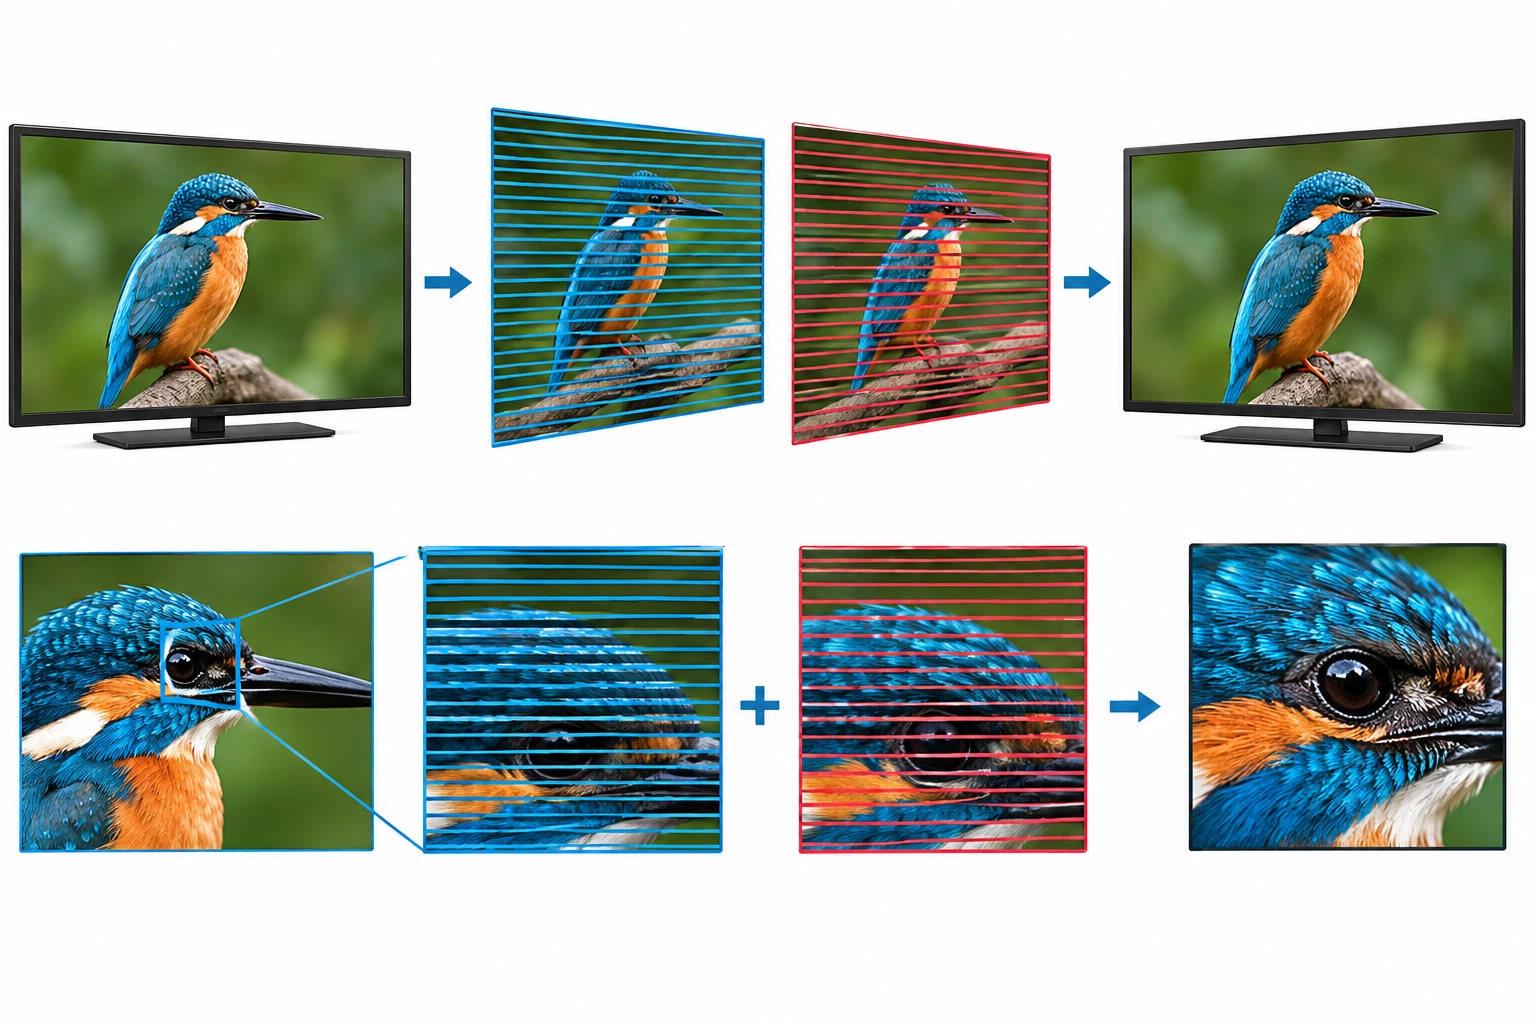
For a detailed explanation of interlacing, see the Wikipedia article on interlaced video, which illustrates the process with animations and graphics.
Digital satellite TV, including DVB-S, is transmitted as interlaced video. Because LanTV stores the television data received from the satellite without altering it, recordings made with LanTV are interlaced.
Computer monitors, however, display progressive video. A conventional TV image contains 25 frames per second, each shown as two alternating fields, while a computer monitor typically refreshes at 60, 70, 72, 85 Hz, or another rate, displaying the complete image each time rather than using interlacing.
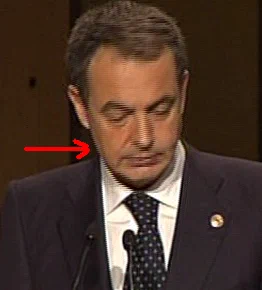
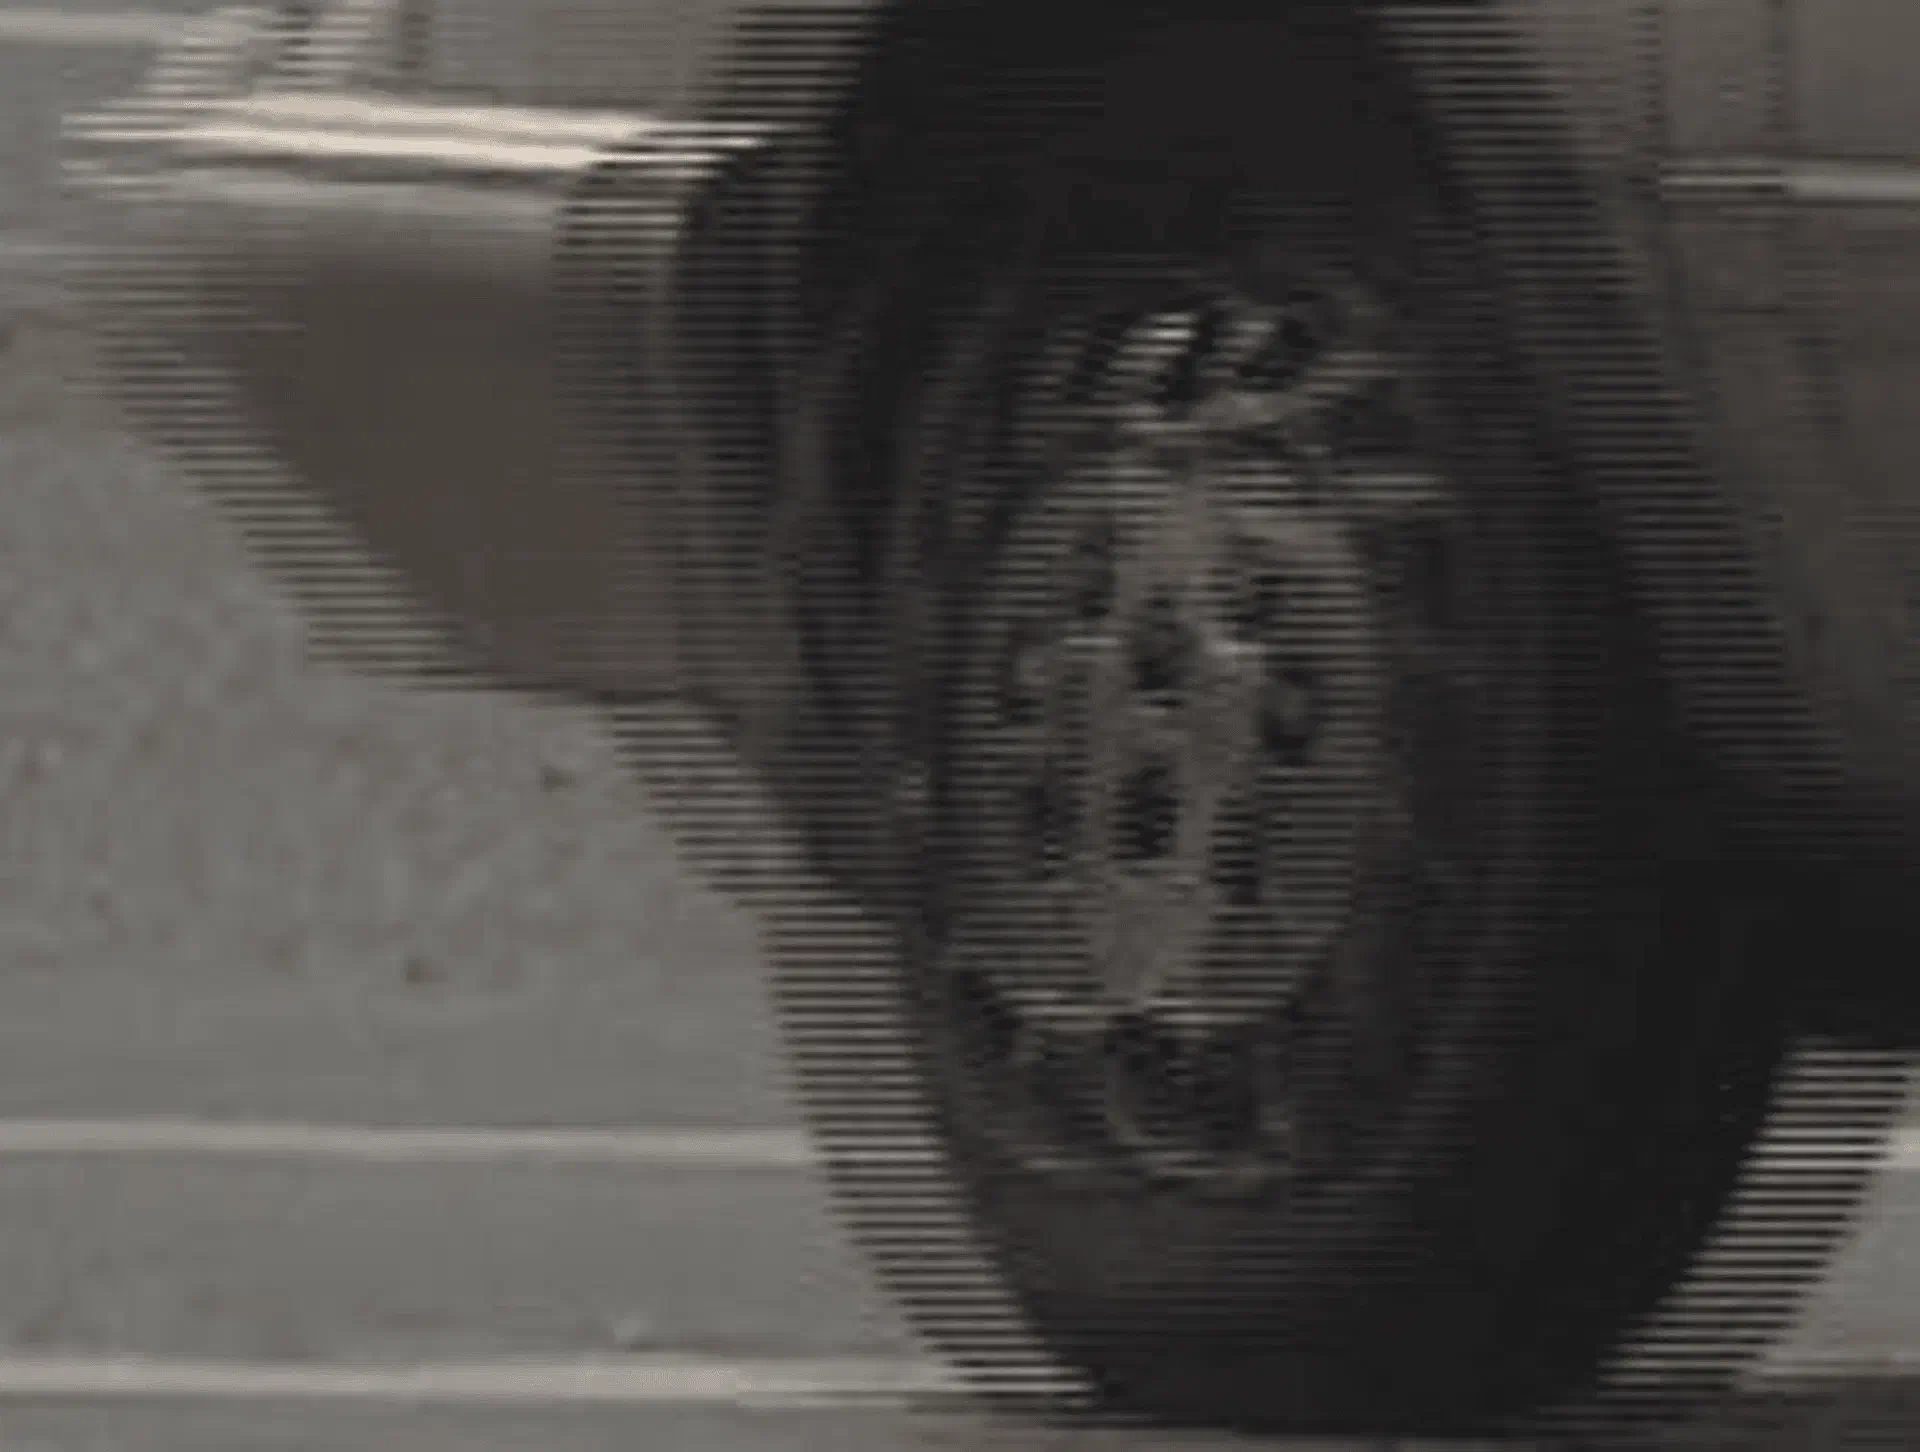
When interlaced TV footage is displayed on a progressive computer monitor, horizontal motion—such as scrolling subtitles or fast movement—can produce jagged edges. Deinterlacing is used to remove this artifact.
The image highlights areas where jagged edges occur. During playback, these edges can appear as slight flicker. As shown, the artifact is visible around the person’s head as it moves horizontally, while stationary areas, such as the jacket collar, remain unaffected.
Deinterlacing
Deinterlacing can be applied during playback only, or it can permanently convert the video file to progressive format. Many tools available online can convert interlaced video to progressive video. However, this is not recommended for LanTV recordings, because the files can be played without flicker on suitable hardware, such as a Stradis MPEG-2 playback card, including when recorded to tape.
Deinterlacing During Playback
Most media players, including VideoLAN Client (VLC), provide a deinterlacing option.
For example, while playing a video in VLC, open Video > Deinterlace and select one of the available modes, such as Bob, Blend, Discard, Linear, Mean, or X. Each mode reduces the appearance of jagged edges to a different degree; the main difference is the algorithm used to process the fields.
In Windows Media Player, when using the K-Lite Media Codec Pack—which uses the FFdshow codecs to play MPEG-2 files—you can open the FFdshow video decoder configuration, enable Deinterlace, and select a deinterlacing algorithm to reduce jagged edges during playback.
Keep in mind that these methods only improve the display of interlaced video on a progressive computer monitor. The source file itself remains interlaced.
Interlaced Footage and Nonlinear Editing Software
In some nonlinear editing (NLE) applications, such as Adobe Premiere, interlacing artifacts can become more pronounced if the project settings do not match the video being edited. This can introduce more noticeable flicker in the exported file. Adjust the project and export settings in the NLE to achieve the desired result.
Field and Interlacing Settings in Adobe Premiere
Adobe Premiere has two sets of field-related settings. Incorrect settings can cause problems in the exported video.
The first set is used when creating a new project (File > New > Project). Instead of using a ready-made project preset as-is, open Custom Settings and configure the required options. One approach is to select a suitable preset, such as DV PAL 48 kHz, under Load Preset, then switch to Custom Settings and adjust the field options.
The screenshots below are from Adobe Premiere 2.0. Other versions have similar settings, although the location of the options may differ.
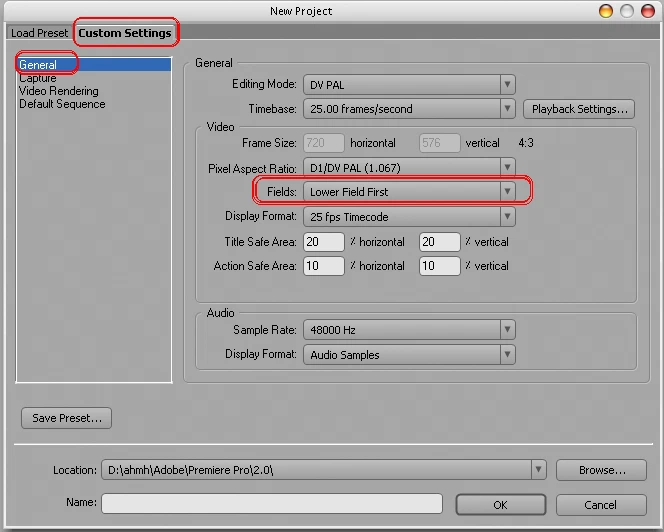
Look for the areas highlighted in red in the image. Change the Fields option and test the available settings to find the most compatible result.
The second set of settings is available when exporting the finished project to a video file (File > Export > Movie). Configure the field settings for the selected output codec to obtain the best compatible result.
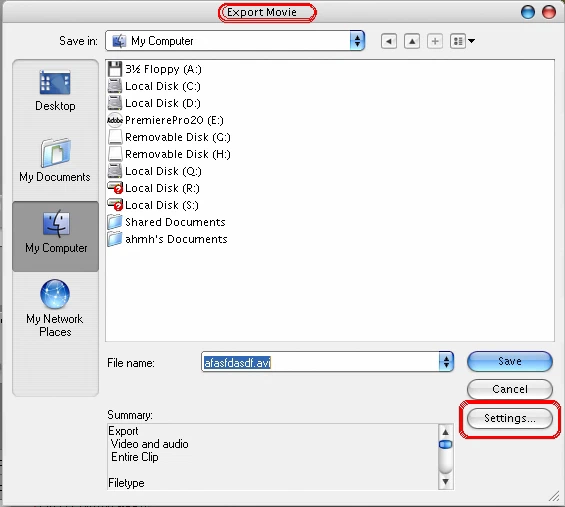
The red highlights indicate where to find the relevant options.
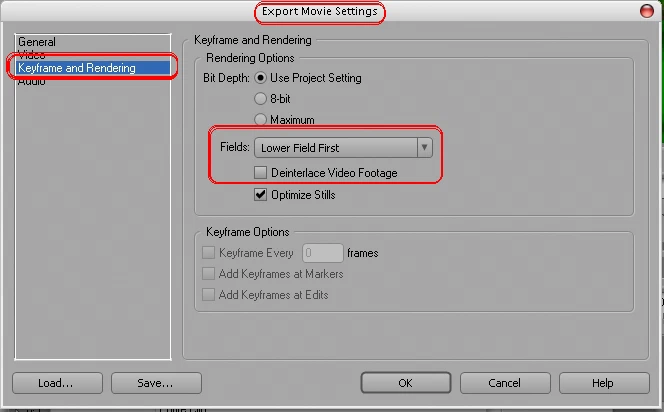
Try enabling Deinterlace Video Footage and testing the available Fields options to find the best result.
Also make sure the other project settings are correct. For example, selecting DV NTSC instead of DV PAL can affect the output and disrupt the project.
Other Nonlinear Editing Applications
Other nonlinear editing applications, such as Pinnacle Liquid and Canopus EDIUS, may have similar settings that affect interlacing. If necessary, consult documentation or an experienced user of the relevant application.